How To format an External Hard Drive Using Windows 10
Assuming anyone who comes across the post is still using Windows 10, we'll use the OS for this tutorial, titled how to format an External drive for Windows 10. With Windows 11, you have to apply the same steps when formatting the external drive. With that said, let's begin this tutorial.
Most external drives are designed primarily to function with Windows-based systems. However, you would need to format in some instances, especially if you plan to partition the drive or remove stored data. Before you begin the process of formatting, you would need to connect the external drive to the computer.
Connection To a Windows Computer
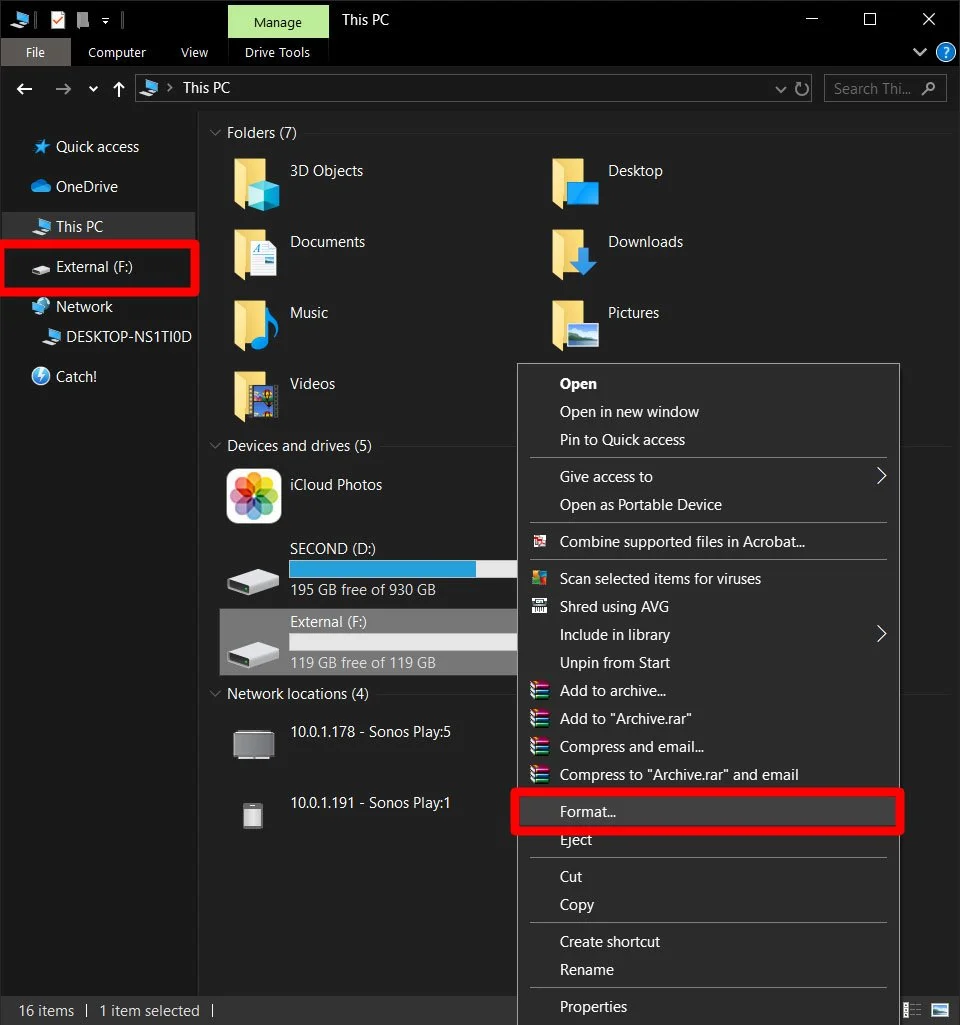
Windows will automatically detect any storage device connected to a computer externally or internally. The drive should appear under Devices and Drives, next to internal drives in Windows 10. The storage drive will also appear in the left sidebar of The File Explorer. First, Right-click on the external drive then proceed to format.
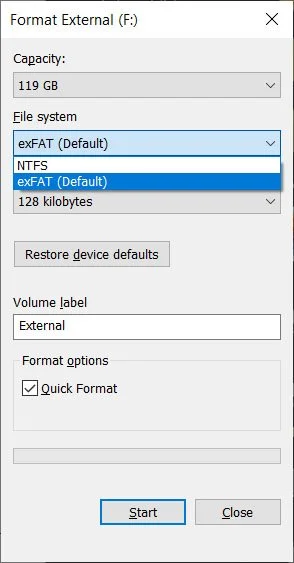
Choose Format Under a File System
Windows computers, by default, will choose the NFTS acronym for New File Technology. Native Microsoft filing system implemented in the early 2000s. If you're connecting the external drive to a Mac, you need to choose exFAT. That filing system only works with Mac 10.6.5 or later, Windows 7 or later.
Quick Format Should be Checked
The format process can take several minutes if files are already in the drive. Remember, formatting also deletes the file. So, once a screen appears, you would click OK once the format is complete.
You now have a formatted external drive for Windows. The overall process is relatively straightforward. Good luck.


